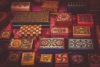
You may have seen beautifully decorated wooden products that have designs burnt into their surface and wondered if and how you could decorate your own wooden products this way.
The technique is called pyrography and it literally means fire writing and is also known as wood burning. There is a learning curve when beginning to create designs using pyrography, it takes practice to develop the skills needed to create shaded and intricate designs.
However, with the help of our article, you will be decorating your wooden keepsakes, hampers, and boxes like a professional in no time.
Let’s begin.
What is pyrography?
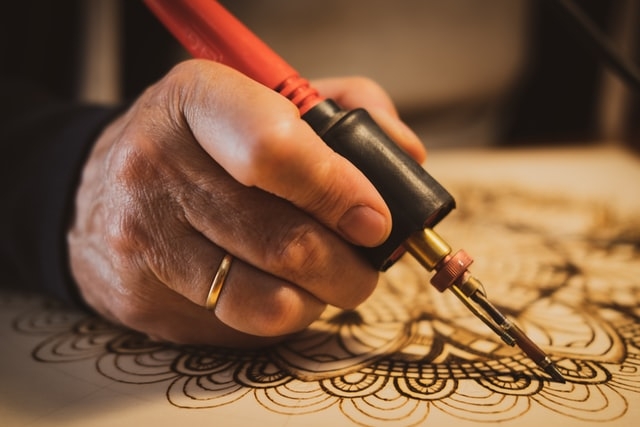
Pyrography is created by burning marks into the wood by using a heated metal tool shaped like a pen.
The craft dates back to the Chinese Han Dynasty around 220AD and was effectively known as ‘fire needle embroidery.
The pyrography tool or pen can be equipped with a variety of tips so that different brushstrokes can be achieved whilst creating your design.
Equipment you need to get started
There are a few essential pieces of equipment you need to get started with pyrography.
You will need:
- A wood-burning pen
- Carbon or graphite paper
- Your design printed on the above paper
- Tape
- Sandpaper
- A wooden surface to add to your design- check out our wooden lidded boxes for your first project.
The wood-burning pen
It is important to get to know your wood-burning pen before you start burning designs into wood.
When it is turned on it gets extremely hot and you need to know how to handle the wood-burning pen correctly to avoid injury.
The wood-burning pen looks similar to a soldering iron, the handle stays cool so you can hold the tool whilst you are working. The opposite end of the pen contains the heated element where you can add different sized and shaped tips depending on the design you are burning.
The wood-burning pen also comes with a stand so that you can put the tool down during your crafting without worrying about burning a hole in your worktop.
Some wood-burning pens also come with a temperature dial which means you can control how hot your wood-burning pen gets.
How to use a wood-burning pen
Choose a tip to use on your wood-burning pen, the main types include shading, dot, calligraphy, groove, branding, and universal. Each tip creates a different effect when creating your design.
To use your wood-burning pen hold it like you would a normal pen. Make sure to keep your fingers behind the guard so you don’t get burnt.
How to create a pyrography design
Now you are familiar with your wood-burning pen it's time to get started creating beautiful wooden box designs.
Prepare your wood
Choose a softwood such as pine, or maple as this wood makes it easier to burn your design and their light color creates a good contrast in your work.
It is important to prepare your wood before starting. Use sandpaper to create a smooth surface and sand with the direction of the grain in the wood. Clean away dust when you’ve finished with a damp cloth.
Create your design and transfer it into the wood
There are two ways you can add designs to your wood ready for burning. If you are a confident artist you can use a pencil and draw directly onto the wood. Most people however prefer to trace a pattern and transfer it onto the wood using carbon or graphite paper.
To do this you first find a pattern you want to use.
Next, tape your carbon or graphite paper to your wood and then place the design over the top.
Using a pen or pencil trace over the design, this transfers it to the wood, check it’s transferring well when you first start and add more pressure whilst tracing if needed.
Remove both papers from your wood, now you're ready to start burning.
Burning your design
Now is the part you’ve been waiting for, burning your design into the wood. Once you’ve set up your wood-burning pen and let it heat up, you can start drawing/burning over the image you transferred earlier.
Take your time and don’t rush, start with the outline before adding any detail or shading. When burning make sure to go with the grain, this will make your lines smoother and easier to burn.
Start your design with light strokes and pressure, you can always go back and make lines darker, but you can’t make dark lines lighter. Sandpaper can sometimes fix small mistakes so keep some on hand just in case.
Finishing your wooden pyrography design
After you have finished burning your design into your wooden box and sanded the excess bumps out. Wipe it down with a cloth to remove any dust and finish off your design either with a clear varnish or coloured paint.
Use coloured paint or any of our coloured wood stains to really make your box pop.
How you choose to finish your wooden box will depend on the level of detail you have added during the burning process. If you have added lots of shading then adding a clear varnish will be a more suitable option.
Extra tips
- Keep your pen tips in good condition by wiping off carbon buildup while you work and always at the end of your project. You will know the tip needs cleaning as it will turn black.
- Use pliers to place and remove tips in your pen. Never leave them in your pen but remember to let them cool completely before storing.
- Work on a fire-resistant surface to avoid any unwanted fires. If your pen is smoking a lot, turn it down if possible as it burning too hot.
- A great tip for beginners is to use two pieces of wood, one as a practice and one as your final piece.
Now you've mastered the basics of pyrography you will need some wood to decorate. Head over to our website and check out the wide range of wooden products we stock. Decorate keepsake boxes, treasure boxes, and Christmas hampers along with many other items.