Transferring your designs on wood can be an exciting and interesting hobby. Engraving your designs on wood creates permanent marks in the wood that can be enjoyed by all the family.
There are a few different techniques that can be used to engrave designs on wood. Each technique varies in price and skill. We will discuss the two most popular techniques in this article to help you decide which is the best way you can start engraving on your wooden keepsake boxes today.
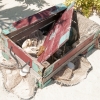
Engraving is a great choice to help personalize gifts such as wooden jewelry boxes, memory boxes, and Christmas boxes. Family and friends will be thrilled to receive such a thoughtful present. Check out the range on Woodeedoo's website.
Wood engraving techniques
The craft of engraving designs on wood dates back many years. Originally people used to engrave designs by hand using a sharp tool.
By the 20th century, this popular craft was made easier and faster by the introduction of motorized tools.
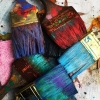
Different tools for wood engraving
While each tool helps to engrave designs on items such as wooden trinket boxes, they give different qualities and finished results. Some tools have a more homemade finish while others will produce a more professional finish.
The different tools that can be used for wood engraving
- Chip carving –This involves a sharp chisel which is used to carve small divots in the wood. This technique can take a lot of practice to perfect. Once you have mastered this technique you will have a lot of control over how deep your design is carved out of the wood. With this technique, no two designs will be the same.
- Dremel – A Dremel is a motorized hand-held tool that spins and can make grooves in wood at varying depths to create detailed designs.
- Lasers – Laser engraving uses a special machine to burn precise designs into wood.
What wood should I use for engraving
There are a few things that can affect the colour and intensity of your engraving when using wood.
First, you need to decide if you want to use hard or softwood.
Hardwoods are generally harder to work with whilst softwoods are easier to work with.
The colour of the wood also plays a part in how your finished design will look.
Darker woods may hide intricate details whilst using lighter coloured woods will show a greater contrast between the wooden base and the engraved design.
It is also important to take note of the resin and sap content of the wood you plan to use.
If you want your designs to be darker a higher resin content is needed.
Woods such as oak, ash, walnut, and mahogany are all good choices
If you want your designs to be lighter and more delicate a lower resin content is needed.
Woods such as pine, cedar, spruce, and fir are good choices.
Engraving wooden boxes using a Dremel
Below are some basic instructions on how you can engrave your wooden keepsake box using a Dremel.
You will need:
- A Dremel Engraver
- Dremel 200 Rotary tool with fine sanding and carving bit
- Any of woodeedoo's wooden boxes
Step 1: First you need to come up with a design you wish to engrave on your wood. You can do this by hand straight onto your wooden box. If you're not feeling that confident you can print out a design you've created on the computer to transfer onto your wooden box.
Start with a simpler pattern until you've mastered your skills.
Step 2: To transfer your design onto your wood tape it onto your wooden box and then use a pen or sharp object to trace your design onto the wood. Make sure to press firmly so you make an indent in the wood. Softwood is a great choice for this method. If you're struggling to transfer your design, colour in the back of the paper with pencil and then retrace your design. The pencil should transfer to the wood leaving an outline.
Step 3: Next use the Dremel tool to go over all the lines in your design, the Dremel will make grooves in the wood creating a permanent engraving in the wood. Start with completing the whole outline before moving on to shading. It helps to hold the Dremel the same as you would hold a pencil. You are already familiar with the actions of drawing with a pencil so it will help build your confidence.
Step 4: To create thicker areas of engraving and shading use a rotary tool. Work slowly so you don't remove too much wood by accident.
Step 5: Once you're happy with your design use a tiny diamond sanding tool on your Dremel to smooth over all the grooves.
To finish you can add wood stain and varnish if you like or leave the natural wood exposed.
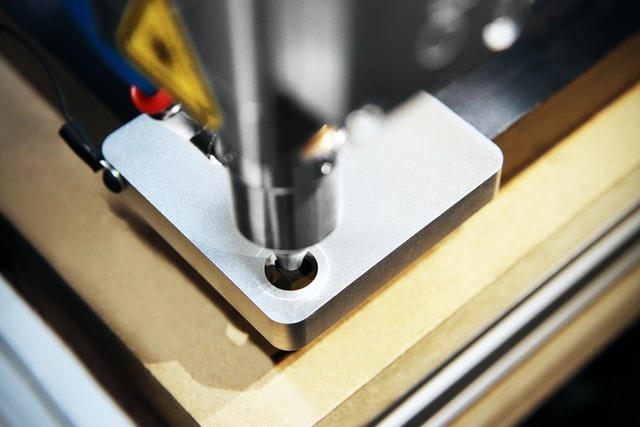
Using a laser engraver to decorate wood
Using a laser is a great way to engrave designs on wood. A laser beam is passed over your wood, heating up the surface and vaporising your pattern permanently into the surface. By using a laser you can achieve more detailed designs than when using other engraving equipment.
Things to consider when using a laser engraver
Below is a list of things that should be considered when using a laser to engrave design on your wooden boxes.
- Remember that wood is highly flammable and should not be left unattended during the laser engraving process.
- You can achieve a darker engraving by changing the focus point of the laser beam. It will increase the spot size of the laser by defocusing it. This can cause some detail to be lost in detailed designs.
- To prevent damage to your laser machine from sticky dust particles add a layer of masking tape to the wood that is being engraved. This also helps the wooden from being scorched during the engraving process. This technique isn't appropriate for detailed designs as you will have lots of little pieces of tape to remove once the engraving is finished.
- Make sure to pick wood that has minimal streaks and imperfections as they can detract from the beauty of the finished engraving.
- Engraving on wood can create a lot of smoke, make sure to invest in a fume extractor fan to get rid of the smoke. The best systems have a gas filter separate from the HEPA filter.
Whichever method you choose to engrave your designs onto wood you will find it an exciting and impressive craft to take part in. Nothing can compare to your design magically appearing on your wooden Christmas eve box or precious memory box for a lost loved one.
Whether you are engraving your wooden boxes for yourself or as gifts for loved ones there are lots of skills to learn to master the art of engraving. In years to come, you will look back on your first project with fond memories as you realise how far you have come in confidence, skill, and knowledge of the engraving craft.