When working with wood there are many different crafts you can take part in. Some crafts are used to decorate a plain wooden item, adding paints, stains or paper. Other wooden crafts involve manipulating, shaping and cutting the wood to create items or decorative pieces.
All of these techniques work perfectly on the products at Woodeedoo, our most popular items are our wooden boxes that come in a variety of sizes. We can’t wait to see your creations.
We’ve compiled a selection of the most popular crafts when working with wood.
Pyrography
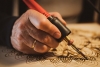
Pyrography from the Greek words “pur” (fire) and “graphos” (writing) and involves burning designs and writing into wood. Adding embellishments to wood using this technique can create quite detailed and beautiful finished products, you’ll be amazed at the pieces you can create.
Tips & Tricks
- YouTube is your friend, watch seasoned pyrographers at work to learn new tips and tricks and understand how best to burn your design in wood.
- Remember no one became an expert overnight, practice on cheap wood to improve your technique.
- Consider sanding your wood, even if it appears smooth. The smoother the wood the clearer and crisper your burn lines will be.
- Use carbon paper to help trace your design on your wood. Simply print out the design, place the carbon paper on the wood and trace your design.
- Make sure to finish your wood to give it a professional finish and protect the wood making your items last longer.
Wood burning techniques
- Don’t press too hard, use a light pressure to build up different differences in burn colour. You can make lighter areas darker but not darker areas lighter.
- Don’t work against the grain of the wood. If you do, you will find your design is harder to create and may not look as crisp.
- Creating an outline of your design before starting will help you focus on technique and filling it in, instead of freehand drawing with a hot tool.
Decoupage
Decoupage is created by gluing paper and tissue paper to a range of items. Almost any surface can be used to create decoupage. Decoupage can involve large or small designs that are added thoughtfully to create products for the home or gifts for friends or keepsakes to keep treasured memories.
Getting Started
The most popular surfaces for decoupage are:
- Wood
- Tin
- Glass
- Ceramic
- Metal
- Fabrics
- Terra Cotta
Once you have chosen your surface you need to select an adhesive to use to stick your papers to your object. There are different types of glue and sealers for decoupage, you can research the most popular on the marketplaces.
The best paper to use for decoupage is thin paper. The thickness of your paper could make or break your project.
The best papers to use are:
- Scrapbook Paper
- Tissue Paper
- Napkins
- Stickers
- Wrapping Paper
What You Can Decoupage
As you can see above there are many different surfaces you can decoupage on but what items could you decorate? Start off small and simple by decoupaging tissue and jewellery boxes and once your skill has developed you can move on to bigger items and oddly shapes items such as furniture and bottles.
What You’ll Need
Here is a basic tool list:
- Brushes –Invest in good quality brushes and make sure to look after them
- A Silicone Mat – Invest in a non-stick silicone mat, you can thank us later. Washable and reusable you’ll won't end up in a sticky mess at the end of your crafting session
- Brayer and Squeegee – Great tools to help smooth out the paper and stick down hard to reach corners.
- Scissors – High-quality scissors are a must to get crisp cut lines every time.
Starting tips
Here are a few tips to get you started on your decoupage journey.
- Prepare your wooden surface by sanding and cleaning
- Pick a glue formula
- Cut your papers, make sure they fit the area needed
- Add decoupage glue to your surface and add your paper onto the glue
- Ensure everything is smoothed out and lying flat
- Add a Protective Coat to the Project
Painting & staining wood
You might think that painting and staining wood should be easy but when creating something beautiful, intricate and small it may take some practice to perfect your technique. Painting and staining wood can bring an old item back to life or transform plain wood into something spectacular.
Painting wood usually covers the natural wood grain, giving a complete covering. If you are wanting to colour your wood but still see the natural beauty of the wood, staining may be a better choice.
Woodeedoo offers a wide range of wood stains in our shop.
Tips for painting and staining wood
- Take your time to prepare your wood. Remove any old paint or varnish if upcycling and make sure to thoroughly sand your wood so you have a smooth surface to work with. Once sanded make sure to clean off any dust and dirt
- Tape off any areas you don't have to paint or stain
- If painting wood choose the type of paint and sheen you want to use. The most common types are flat, matte, satin, semi-gloss and gloss
- When painting and staining, start from the top of the wood and move down.
- Wait for the wood to dry fully before adding one to two more coats of paint, or more wood stain to get a complete coverable and desired colour.
- Make sure to add a finish to your wood, this could be a seal, waxes or varnish.
Wood engraving
Engraving designs on wood involves a laser beam passing over the wood and vaporizing the top layer of wood. The finished results are pristine, smooth and crisp. It is hard to replicate the effects of laser engraving using other equipment.
There are lots of designs you can create with wood laser engraving including names, logos, images, and prints.
These can be added to most wooden items such as:
- jewellery boxes
- cutting boards
- key holders
- plaques
- memory boxes
Tips for wood engraving
- Consider the type of wood you want to engrave. Soft woods produce a lighter engraving but are quicker to make compared to hard woods need a lot of power and pressure to engrave and have a darker finished result.
- Check the resin content of your wood. Dryer wood will create a lighter finished result than wet, sappy wood.
- When creating larger designs add application tape over your wood to stop dust from sticking to the wood and causing your machine to stop. This isn’t needed for smaller engravings.
- Make sure to install a good fume extractor as engraving wood can produce a lot of smoke.